Carbon Fiber Skinned Plywood Core Fins

Posted on September 10, 2017 at 2:20 pm in

Spoiler-alert, the fins turn out great!

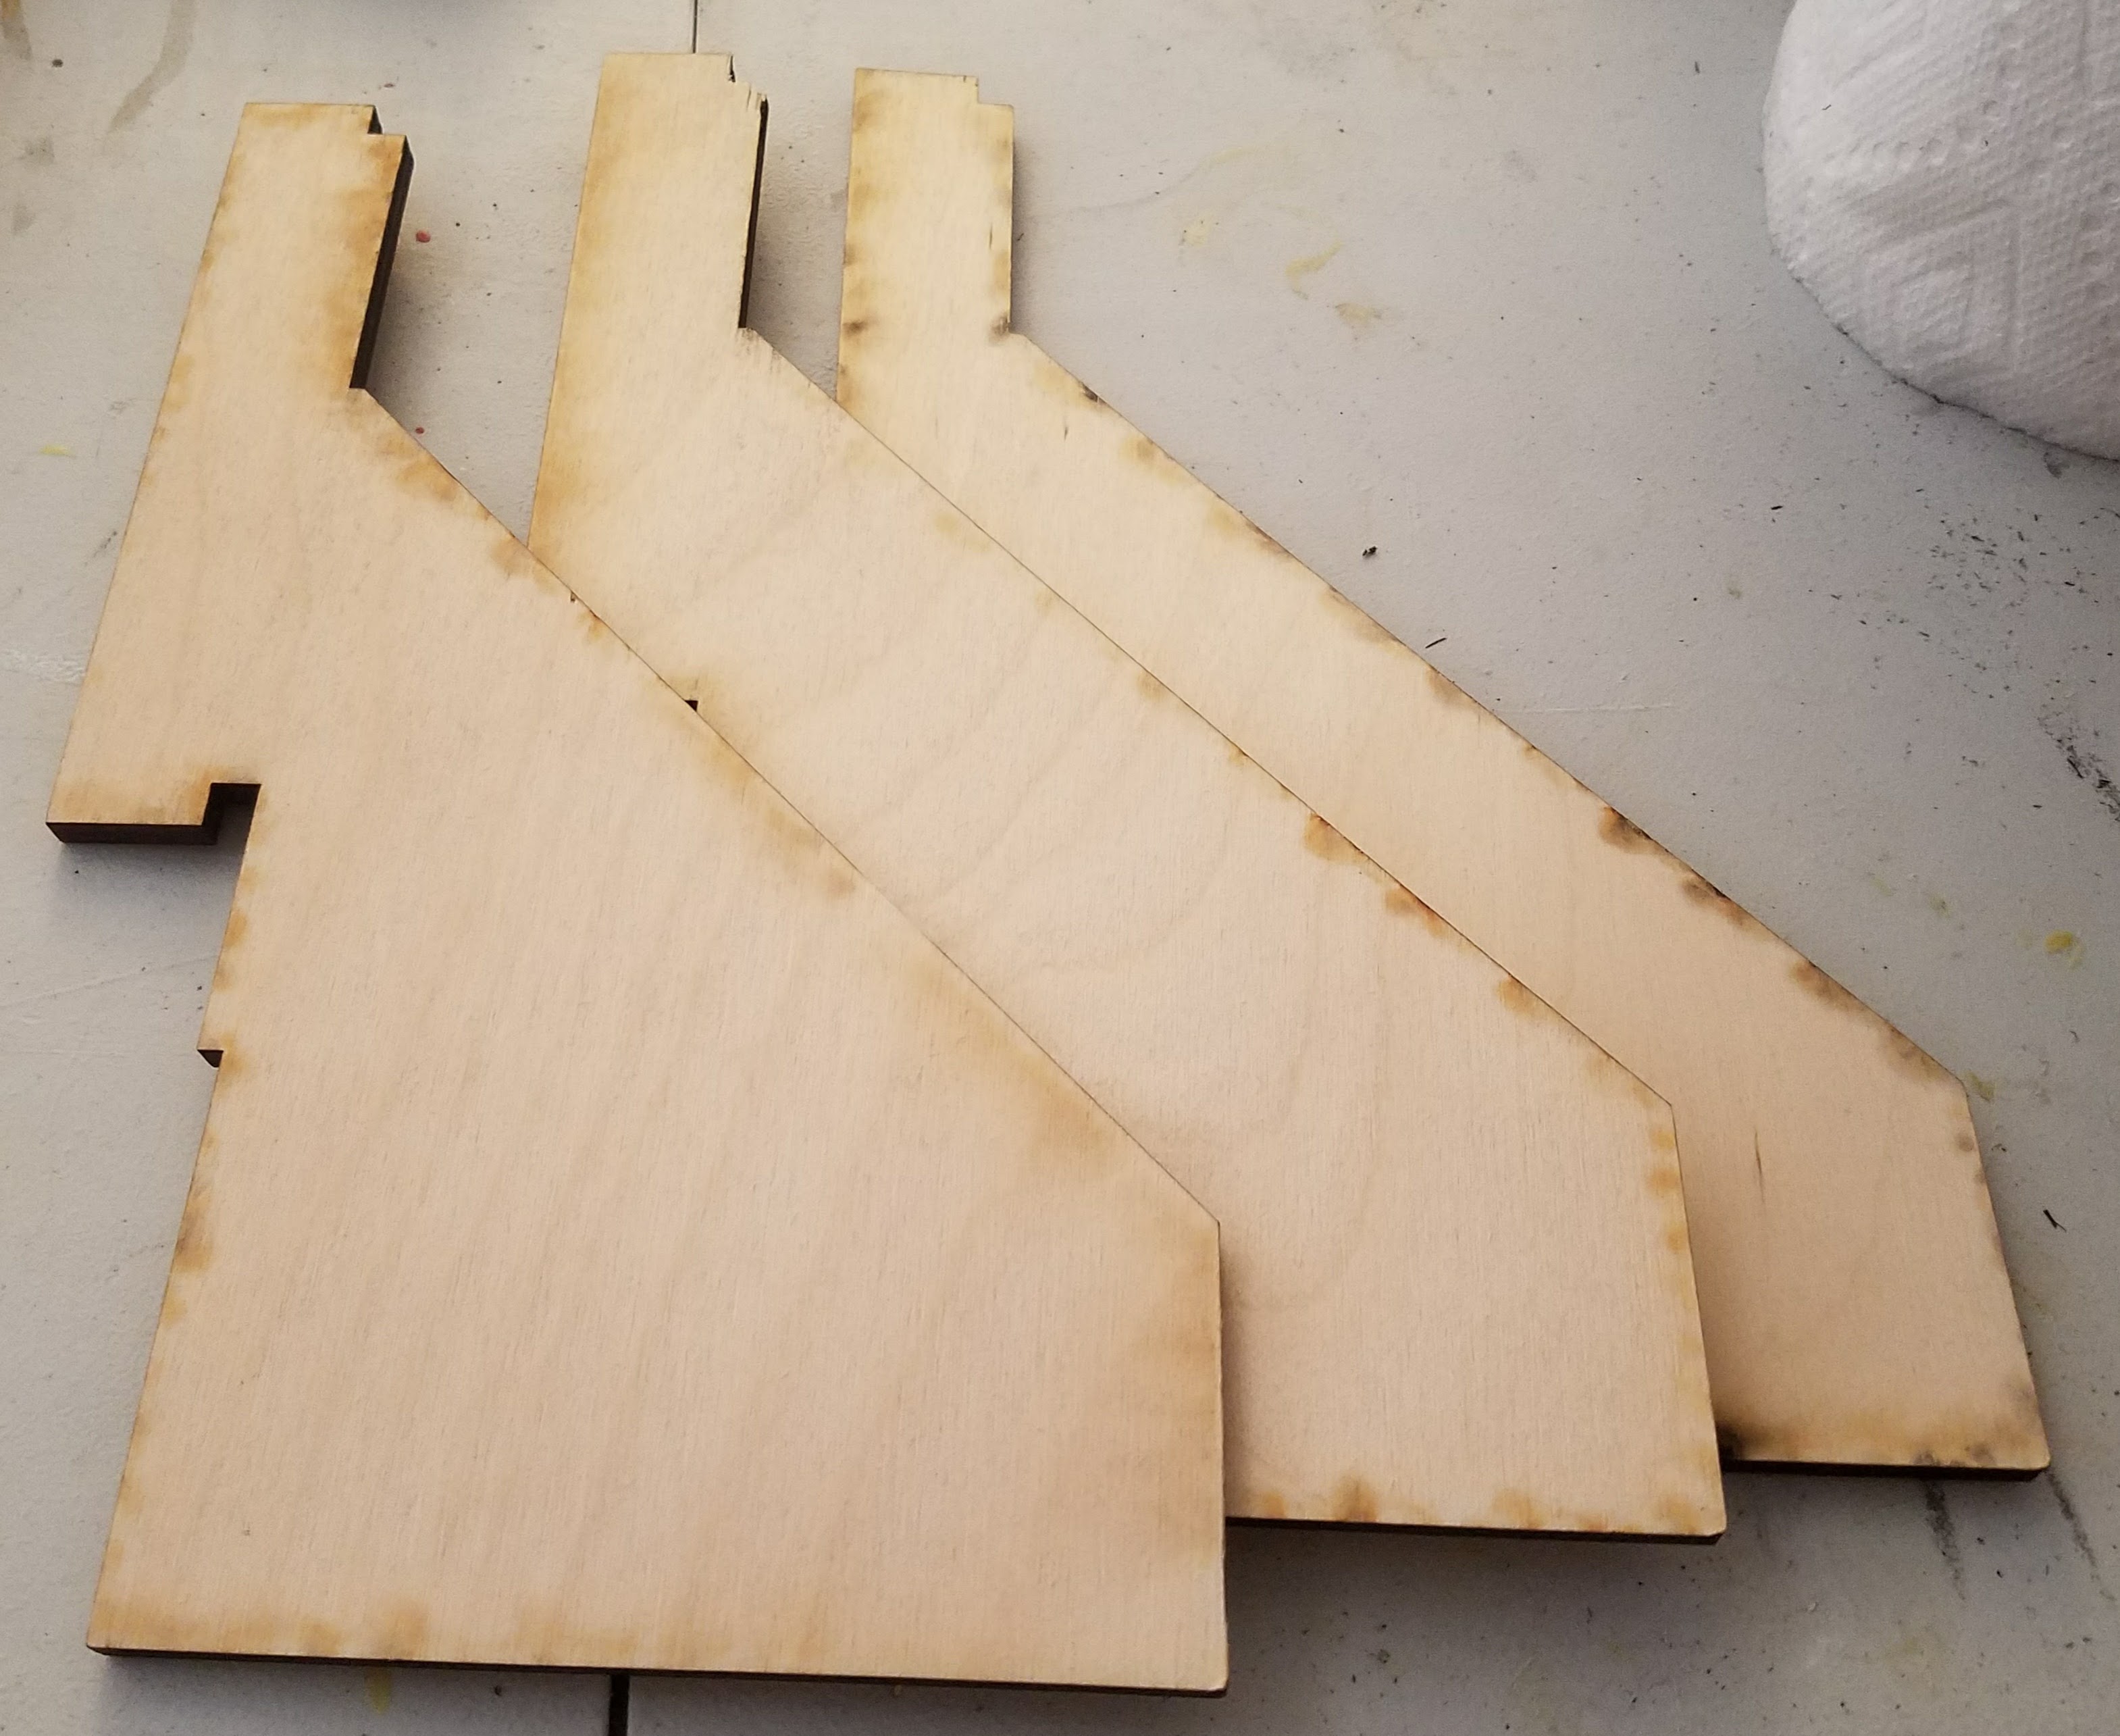
Original laser-cut 1/4″ birch plywood fins.

At the National Sport Launch 2017 in Alamogordo, NM, I picked up a large crayon bank kit from Discount Rocketry. It comes with a 38 mm motor mount and 1/4″ birch plywood laser-cut parts. The kit is nicely put together, but I wanted to do a little something extra with the fins to help ensure a good flight with a J motor in it. My goal was to bevel the fins and laminate them with carbon fiber. I’ve done a small amount of fiberglass work, but I’ve never dealt with carbon fiber, and I’ve never done vacuum bagging before, and both of those would be required for this project.  The equipment for this project included a fin beveling jig, a Foodsaver vacuum sealer, a custom edge drilling guide, and a buffing wheel with a polishing compound. The supplies included 5.7 oz carbon fiber cloth, 2 oz fiberglass cloth, laminating epoxy, 100% polyester smooth tightly woven cloth (instead of peel-ply), paper towels (instead of breather material), multiple grits of sandpaper (120, 180, 220, 400, 600, 800, 1500, and 2000), and a 12″ vacuum bag roll. Continue reading Carbon Fiber Skinned Plywood Core Fins…


Conservation Framing

Posted on August 30, 2016 at 3:03 pm in

finalAriel Lyons, a fantastic artist whom you should contact for all your art commissioning needs via her Facebook page https://www.facebook.com/priddylyons/, painted a family portrait for my sister-in-law. I’ve done some picture framing before, and I’ve made a few custom frames in the past, but this project is different. This is a one-of-a-kind piece of original art, and that means we have to take the frame package much more seriously. For this type of frame package, we want to be sure that everything is acid-free (I know, wood frame, I’ll get to that); not only should things be acid-free, but the mat board should be buffered as well to prevent environmental pollutants from causing harm. The glass should be UV filtered to prevent fading, the frame package should be sealed against dust while allowing it to breathe, and the art must not touch the glazing to prevent humidity (and worst case, condensation) from damaging the art.
Continue reading Conservation Framing…


Brass Straight Key

Posted on July 26, 2014 at 11:36 am in

IMG_20140726_112847 I just finished working on my first straight key. This is my first time working with brass, and it went fairly well. The brass polished up nicely, and according to my multimeter, it works properly too! The mortises aren’t as clean as I would like since the walnut burl has funky grain, and based on the angle of the axle, I apparently don’t have as square a drill press as I thought. Overall it looks great though, and I’m happy with the results. Now I just need to finish building a radio so I can actually use it!


Tags:

ADS-B Antenna

Posted on May 18, 2014 at 7:53 am in

adsb-mapNathan & I built a slim-jim style antenna tuned for 1090 MHz a few weekends ago for ADS-B reception. What is ADS-B you ask? It’s a signal transmitted by a growing number of airplanes containing a variety of information, including the gps position and altitude.
Continue reading ADS-B Antenna…


First two antennas are up!

Posted on April 13, 2014 at 6:43 pm in

IMG_20140413_164534The first two antennas are on the workshop roof with the help of my little helper Nathan and my big helper Sam. Sam got on the roof yesterday and mounted the antennas for me; I got most of the way up the ladder when my knee told me that going further was a terrible idea. The cables were just sort of dangling afterwards, so Nathan & I got to work today. After some knee stretching last night, I was able to get up and down the ladder reasonably alright today to attach the coax to the wall; it at least wasn’t shaky like it was yesterday. Continue reading First two antennas are up!…


Dual band (2m/70cm) yagi with duplexer

Posted on April 5, 2014 at 7:35 pm in

IMG_20140405_191752The second project of the day was a dual band antenna to try to hit amateur satellites with. This particular one is 2 m & 70 cm. The construction is 1/8″ brass rod with a small duplexer. There are no results to report so far, other than we were able to hit a local 2 m repeater with it. There was one pass of the satellite SO-50 this evening, but we didn’t get anything. We were also in the house and without a good compass, so it doesn’t count. The construction was fairly simple, and some reference sites are listed below. It should have a reasonable amount of gain, and the duplexer should be effective at splitting the signal between the bands, and it should be tuned correctly, but I don’t have the proper tools on hand to test any of that. One of these days I’ll get an oscilloscope, a signal generator, and an SWR meter, and I’ll be much better able to test a lot of these things at that point.

IMG_20140405_191818For today though, it was a fun project, and my first attempt at surface mount soldering. Future plans are to do some more testing in the 2 m and 70 cm bands with other ground based radios at both 1 and 5 watts to try and verify the duplexer is functioning, and an outdoor test to try to hit SO-50 once we’re sure the antenna is working.

  • http://k0lee.com/duplexer.php
  • http://www.wa5vjb.com/yagi-pdf/cheapyagi.pdf
  • http://www.wa5vjb.com/references/Cheap%20Antennas-LEOs.pdf
  • http://www.g6lvb.com/HomebrewArrow.htm

Quatrefoil Helical Antenna Project

Posted on April 5, 2014 at 6:49 pm in

qfhSay what? A quatrefoil helical antenna is a type of mostly omni-directional antenna that, in this instance has about 3.6 dB gain to the horizon at 137 MHz. Why would you want one? As it turns out, there are 3 NOAA satellites that transmit images in an analog mode called APT as they orbit the Earth. NOAA-15 on 137.620 MHz, NOAA-18 on 137.9125 MHz, and NOAA-19 on 137.100 MHz. Continue reading Quatrefoil Helical Antenna Project…


“Fat 50” ammo cans as saddlebags

Posted on October 3, 2011 at 7:39 am in

A few Redditors asked for pics of my ammo can saddlebags this morning, so here they are. They’re mounted using Easy brackets (http://easybrackets.com) which work really well for this. When I pull them off, only the chromed mounting studs remain.


More great progress on the trailer.

Posted on May 30, 2011 at 9:09 pm in

There was a lot of progress made on the trailer this weekend. I got the running lights wired to the hazard switch, and then I got that wired into the junction box and the junction box wired up to a 7 prong trailer plug. I also got the two circuits for the pumps run, and two circuits for the lights run. The interior lights are installed and working, and the porch light has a wire run via a switch by the door. With the exception of attaching the porch light, which will be done after the roof skin gets put on, the electrical work is complete! After that, with Sam’s help, we got the lifter cables adjusted so that all four corners lift to the same height, and while I was crawling around under the trailer, we also got the copper lines for the propane run. The furnace is now properly vented on the outside and hooked up to propane, and it works great! The line for the water heater & stove is in place with the valve shut off for now so the furnace could be tested. Those will be hooked up with a couple of 3/8″ flare hoses that I need to pick up, but other than hooking up those hoses, the propane work is basically done! The final task of the weekend was to bolt the wheels back on now that the work under the trailer is out of the way. There’s still a hole to drill for the drain, but that will be towards the edge of the trailer, so the wheels won’t be in the way for that. Next weekend I need to get the aluminum for the roof ordered, and then I need to start working on installing a ton of T-nuts for the track that holds the canvas at the top. Those have to be in before the roof can be skinned. After that will be doing the plumbing for the water system.


Tags:

The Roof!

Posted on May 22, 2011 at 9:11 pm in

It was a good weekend. The roof has been built and bolted to the lifters. I also installed the winch switch and wired it into the main junction box; there’s still a bit of cable arranging to do for the winch, but that will wait until the final adjustments can be made to the limit switches. Next on the list is ordering the aluminum for the roof, and then working on the final electrical details. After that is some plumbing, gas, and the final cabinet parts such as drawers and countertops.


Top